How to remove lead paint

Lead paint can be a serious health hazard for homeowners, especially those with children. It's is the leading cause of lead poisoning in the U.S., according to the Mayo Clinic. Yet, many American homes are still covered in the poisonous material. The Department of Housing and Urban Development estimates that more than 37 million houses have lead paint.

If you suspect that your home is one of them, you should take steps to mitigate its toxicity, or better yet, remove the paint altogether. To get started, review these important tips:

Schedule lead paint testing
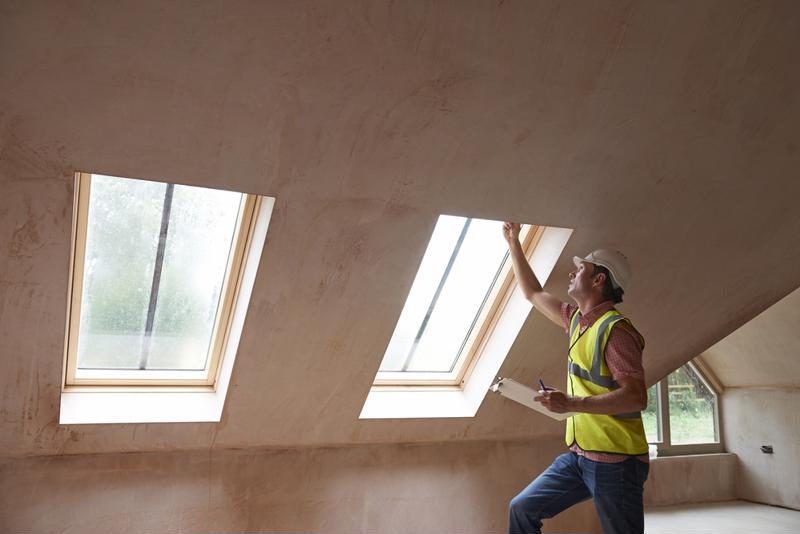
Before you begin contacting contractors or gathering supplies for a do-it-yourself job, call up a local home inspection company and schedule lead paint testing. The federal government banned the use of lead-based paint in 1978. If your home was constructed prior to this embargo, there's a good chance it will test positive.

You can perform the assessment on your own with a store-bought kit sanctioned by the Environment Protection Agency. However, its better if you leave this duty to professionals, as simply performing such a test can be dangerous, Better Homes and Gardens reported.

Before beginning your lead paint-removal project, be sure to pick up the proper equipment.Before beginning your lead paint-removal project, be sure to pick up the proper equipment.

Try the DIY method
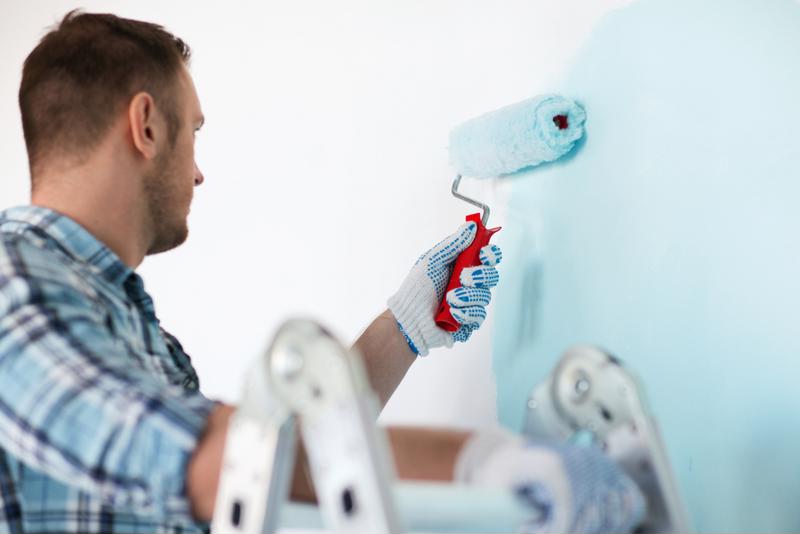
When it comes to actually executing your lead paint-removal project, you have three options: encapsulation, enclosure or removal. The first method involves covering a preexisting lead-painted surface with water-tight sealant, the National Association of Realtors reported. This is by far the most cost-effective solution, as encapsulation mixes roll on like paint and cost about $35 per gallon. Enclosure is a more elaborate process in which lead-laden walls are enclosed by brand new drywall. With removal, you'll be required to actually get rid of your lead paint and swap if for a healthy alternative. Though many consider this to be the ideal solution, removal is an involved process that requires planning and special equipment. 

When securely attached to the wall, lead paint poses few problems. However, if disturbed, the stuff gives off toxic dust that, if inhaled, can cause lead poisoning in adults and children. Obviously, if you plan to remove the lead paint from your walls on your own, you must prepare for the clouds of harmful debris that will likely fill your home.

First, remove everything in the vicinity of the painted area, including clothing, decorative fixtures, food and furniture. Anything you can't remove should be securely wrapped in plastic. Basically, there can be no crevices in which toxic lead-paint dust can linger, according to the EPA. If you're taking up a large amount of lead-based paint at one time, you might even need to build a makeshift airlock. Again, you can use plastic sheets to do this.

Next, you should acquire some key protective gear. A disposable respirator will be necessary. You want to purchase an N-100 model equipped with a National Institute of Occupational Safety and Health-certified, high-efficiency particulate air filter. Goggles and gloves are also must-haves.

Of course, you'll need tools for taking up the paint. Wet sanding is commonly used technique. You can use a heat gun or hand scraper as well. But no matter which method you choose, be sure to properly prepare your home. Removing lead paint is dangerous work. 

Call a contractor
If you live in a state that bans individuals without lead poisoning training from undertaking lead abatement projects or simply aren't interested in doing the work yourself, calling in a contractor is your only other option. Most charge between $8 and $15 per square foot for lead paint removal. Just be sure that the contractor you ultimately hire has been certified through the EPA's Renovation, Repair and Painting Program.

Tips for painting like a pro

If you're looking to test the housing market, you should probably make simple home improvements before staking down the for-sale sign. Of course, it can be difficult to choose which areas to address. Fortunately, there's one cost-effective interior upgrade sure to score you major points with prospective property purchasers: new paint.

Most do-it-yourself painting projects cost around $100 to complete and net 1 to 2 percent returns, according to Consumer Reports. But before you ready your roller, review some professional-grade interior painting tips.

Properly prep surfaces
Successful painting projects often begin with preparation, Popular Mechanics found. Take stock of your walls and look for damaged areas that might require patching. Though time consuming, this step is essential, as most interior paint blends – even the expensive kinds – aren't engineered to hide serious imperfections.

Most professional painters use putty or spackle to fill in pock marks, This Old House reported. For more serious dents deeper than one-eighth of an inch, switch to plaster. Once you've filled all the holes, perform some intensive sanding to get rid of chipping and create a fresh surface for your new hue.

Finish off the prepping process by rolling on a couple coats of primer. This stuff is essential, as it prevents drywall staining and helps paint adhere to walls. However, don't apply primer straight out of the can. Tint the mixture by stirring in some of your primary paint.

Good equipment often yields favorable results.Good equipment often yields favorable results, so choose your roller wisely.

Pick the right paint
When shopping for paint, most homeowners focus on pinpointing the perfect color and spend little time talking texture. Experts uniformly agree that this superficial approach to picking paint often yields shoddy results. So, as you peruse the interior hues available at your local home improvement store, carefully consider your finishing options. Most manufacturers produce paints in two main finishes: gloss and matte.

Glossy paints are more stain resistant than matte blends but often emphasize imperfections. Conversely, matte paints are better at hiding vertical bumps and bruises but look drab when applied to walls. As a result, most professionals work with glossy paint.

"Flat paints are fine for ceilings and formal rooms, but for most of my customers, I recommend an eggshell gloss," Carmen Toto, owner of the Madison, New Jersey-based painting company C. Toto and Sons, told This Old House. "It's good for hallways, kids' rooms, even kitchens and baths."

No matter which finish you choose, make sure to purchase quality paint. Most cost between $20 and $35 per gallon. You might also consider buying some paint additives as well. These substances slow paint drying times and make it easier to manipulate once its on the wall.

Gather the necessary equipment
After you've picked your hue and finish, nab some essential painting accessories. First, you'll need a drop cloth to protect your flooring against unexpected spills. Canvas cloths are more effective than plastic alternatives, as they don't tear and easily absorb paint, Popular Mechanics found. 

"Canvas drop cloths are more effective than plastic alternatives."

Next, choose your painting tools. Professionals normally use a combination of rollers and brushes. Most work with rollers equipped with half-inch naps made of lamb's wool. These hold a good amount of paint and don't create too much texture. 

When shopping for brushes, turn your attention to bristle type. Brushes with stiff, polyurethane bristles are good for detailed work while those with nylon bristles more effectively spread paint across large surfaces. Quality, professional-grade brushes cost anywhere from $15 to $25. However, the spend is usually worth it at the end of the day.

"Pros aren't as talented as you thought," Richmond, Virginia-based painter Brian Doherty told This Old House. "The equipment has a lot to do with their success."

With these guidelines in mind, go forth and get to painting. Prospective buyers will appreciate your efforts.

Home inspection mistakes to avoid

Home inspections often bookend the property purchasing process. Unfortunately, many buyers fail to give this final step the respect it deserves. As a result, costly structural problems sometimes slip through the cracks.

So, before you start unloading boxes and inviting over guests, call up your local home inspection company and schedule time with a state-certified inspector. Once he or she arrives, pay attention and avoid making some common and costly home inspection faux pas.

Failing to attend
Attending your own home inspection is absolutely essential, Trulia reported. Not only will you learn more about your new home and gain valuable maintenance advice, but you'll also be there to make sure nothing unscrupulous happens. Sometimes, inspectors take advantage of absentee homeowners and pass up hard to reach areas.

"If it's raining, the home inspector may avoid inspecting some exterior areas, such as the deck or crawl spaces," real estate attorney Rob Pellegrini told Trulia. 

To prevent such an oversight, attend your inspection and pay attention. In the end, it's worth the time investment.

Not asking questions
During the inspection, don't be afraid to ask questions and seek out understanding. Some homeowners are too afraid to break in with questions or too embarrassed to admit they don't know something. Unless you're an architect or general contractor, you shouldn't be concerned about embarrassing yourself. Instead, focus on learning as much about your new home as possible.

Most inspectors are prepared to answer questions and justify their conclusions, Angie's List reported. So, fire away.

Home inspectors can save you a lot of money.Home inspectors can save you a lot of money.

Having lofty expectations
Sometimes, homeowners expect inspectors to uncover every issue and save them thousands of dollars. Of course, these sort of expectations normally set the stage for major disappointment. So, don't go down this path. Instead, be realistic, NBC News advised. Even the most qualified inspectors overlook things occasionally. And, remember, they can only inspect what they can see.

"We can't see through walls," Frank Lesh, president of the American Society of Home Inspectors, told NBC News. "And we can't tear into walls and look for things."

The only thing you can do is stay even-keeled and set yourself up for success by carefully vetting prospective inspectors. Ask family, neighbors and friends for recommendations and read online reviews. Additionally, ensure that your candidates belong to key professional organizations like ASHI or the National Association of Home Inspectors.     

Not respecting the report
Inspectors normally issue reports upon finishing their walkthrough. In some cases, buyers on the cusp of closing disregard these reports. Others play down serious problems and put off repairs. Don't do either of these things. Carefully read your report and focus on key features like the foundation, the roof and the heating and cooling and electrical systems. If your new home shows signs of catastrophic damage in any of these areas, don't be afraid to pull out of the sale.

How to remodel on a budget

Homeowners looking to net extra profits during the selling process often turn to remodeling. In many cases, this approach works. House hunters normally react well to newly installed hardwoods, kitchen fixtures or other homey bells and whistles.

However, remodels are notoriously risky, especially large-scale, expensive ones. As a result, most home experts advise owners to stick with small projects that comfortably fit into their everyday budgets. Of course, this doesn't mean you have to settle for shoddy, short-term fixes. Profitable, lasting changes are still possible with some sly budgetary maneuvering.

Start with a plan
Remodeling is serious business and requires proper planning. So, before you start calling up local contractors, walk through your home and look for key areas due for upgrades. Once you've pinpointed some trouble spots, consider the possible return on investment. Small and medium fixes like replacing the front door or installing new windows often yield the most value upon sale, the magazine Remodeling reported.

Once you've picked a location, draft an exhaustive materials list. Make sure to include everything, as inadequate planning often leads to inflated costs, HGTV reported.

"One of the factors that sends a budget spiraling out of control is a homeowner picking products during the renovation," Robin Siegerman, chief of design and renovation at Sieguzi Kitchen and Home Inc. in Toronto, told the publication.

Recruit a home improvement partner
Few do-it-yourself remodeling projects turn out well. So, it's in your best interest to hire a certified contractor to oversee your remodel. However, don't dial one up before putting together a scope of work and projected timeline. Do a little research and find how long your project might take. Also, see what labor costs are in your area. Contractors charge based on the area they service, as business tax rates and licensing fees vary depending on the state or city, The Washington Post reported. Most also budget in multiple workers and cushion time.

If you're looking to get extra low labor costs, consider starting your project in the winter or spring, This Old House recommended. Most contractors have busy schedules in the summer and fall and tend to charge more as a result. Plus, material availability falls off, which leads to slower project completion times.

Go for smaller projects instead of grand, time-consuming remodels.Go for smaller projects instead of grand, time-consuming remodels.

Save on material costs
Most of your budget will go toward materials and related costs. With this in mind, focus on trying to contain these expenditures. In most cases, this doesn't require compromise – just some well-placed elbow grease and a little forward thinking. For instance, hauling your own materials can save you some money on delivery costs.

Leveraging your contractor's connections will also help when it comes time to source. Many work on multiple job sites and can often score otherwise expensive materials for free.

Building-supply auctions are another good option. Most offer scratch-and-dent and overstock for a fraction of the retail price.

Of course, look-a-likes are often good alternatives to more expensive options. Plus, many last for just as long as their budget-busting counterparts. For example, hybrid tongue-and-groove wood flooring often keeps better than costly mahogany planks.    

Avoid playing with plumbing
Bathrooms and kitchens are often remodeling hotspots. It makes sense, as these rooms get the most foot traffic. Unfortunately, many homeowners take it too far and try to completely reshuffle such spaces, drafting up grand plans that involve relocating sinks and dishwashers. Most experts advise against moving appliances and key water hookups. These maneuvers often bring about unintended plumbing problems that end up sinking budgets.

Even perfectly executed moves are expensive. Some say it costs, on average, $5,000 to move a single appliance. So, avoid this situation at all costs.

However, if realizing your radical new redesign requires such an operation, build additional space into the budget for new plumbing.

Home improvements that will increase your property value

Sellers are forever hunting for renovations that will increase their property values and net higher offers. Of course, there are plenty of home improvement pitfalls that will accomplish just the opposite. If you're looking to stake a for-sale sign, be sure to focus on fixes with good cost-value ratios.

Create wide-open spaces
Most modern homebuyers gravitate toward homes with open floor plans, This Old House reported. Sellers with homes that feature manifold divisions should think about knocking down some non-structural walls to create interior flow and let in light. One downed wall could open up your living and dining areas and entice feng shui-seekers to take a tour.

While you're at, take some time to address clutter in general. According to Consumer Reports, some simple cleaning and reorganization can garner a 3- 5 percent return.

For most homebuyers, open floor plans are the be-all and end-all.For most homebuyers, open floor plans are the be-all and end-all.

Tweak bathrooms, the kitchen
Buyers often focus on bathrooms and kitchens. In fact, in a nationwide survey of real estate experts, Consumer Reports found that more than 50 percent of respondents believed the kitchen was one of the most important spaces for house hunters. However, many caution sellers against dropping cash on major kitchen renovations.

"Given all the volatility in the real estate market, you can't spend megabucks on any project, even a kitchen, and expect to get that money back," Bill Wilson, an Upstate New York-based realtor, told the publication.

The data bears this out. According to the magazine Remodeling, minor kitchen remodels normally net returns of -4 percent.

Instead of embarking on a serious kitchen renovation, make some small, yet impactful tweaks. Purchase a new faucet – low-flow models will improve your home's energy efficiency – and do away with antiquated or harsh lighting fixtures. Additionally, perform a deep clean and remove food-particle buildup in hard-to-reach areas. To top it all off, add a fresh coat of light paint and switch out the curtains and blinds.

"Complete bathroom remodels often offer bad returns."

You will want to use the same minimalist methodology when making improvements to your bathrooms. Complete remodels in these areas offer bad returns. Remodeling reports numbers ranging from -3.4 to -5.9 percent. So, make conservative tweaks. Re-grout floor tiles and other gaps. Replace cabinet pulls, knobs and bath and shower hardware as well.

"I tell my clients to replace anything with a handle, especially if the home has hard water, since it causes so much metal corrosion," Pennsylvania-based real estate consultant Ginny Ivanoff told Consumer Reports.

Facilitate an entry to remember
As homebuyers tread up the drive to conduct a walkthrough, they are greeted by the front door. According to real estate experts, this seemingly dull encounter can determine the outcome of a sale. 

"Don't underestimate the power of a front door," Kristin Willens, senior manager of Program Development at the Massachusetts-based realty firm ERA Real Estate, told This Old House. "People make up their minds in the first seven seconds of entering a house."

Entry door replacements do indeed pay off. According to Remodeling, most garner returns of over 5 percent. So, be sure to make this key exterior upgrade. Additionally, install a new bell and consider adding a portico. If you don't have room in your budget to accommodate replacement, add a new coat of paint. Choose a color that not only reflects your home's interior aesthetic, but also gives buyers insight into the life you and your family lead within its walls.

Of course, if you're a neon-pink sort of clan, take some time to reconsider more understated alternatives. As you look through swatches, consider the architectural style of your structure.

Improve your curb appeal with plants

Curb appeal is immensely important to homebuyers. In fact, according to a survey conducted by the National Association of Realtors, more than 80 percent of buyers will pass on a property if unimpressed by its landscaping or street-facing features. Most sellers work to avoid this situation and improve curb appeal with outdoor upgrades, including plants. Of course, picking shrubs, trees or flowers that best accentuate your abode is no easy task. Before you hit the home-improvement store, familiarize yourself with some key plant-placing guidelines.

Build a strong foundation
According to This Old House Magazine, sellers should start the planting process by installing some foundational, house-hugging shrubs. These small wonders can hide unattractive, yet essential home features like drains and gutters. As you look into different options, focus on forming a cohesive mix of plant life rather than going after taller, show-stopping specimens that might block windows or entrances.

"The right foundation planting for most houses is a nice mix of evergreen and deciduous material, with dwarf varieties in order to keep window views open, some repetition of plants for a unified look, and an overall casual, naturalistic feeling," landscape architect Anne Walters told the publication.

Start by purchasing some stout evergreen shrubs like littleleaf boxwoods or inkberry bushes. Then, add in more colorful selections, such as Japanese pieris and hydrangeas.   

Once you've made your choices, remember to consider placement as you plant. Line the wall with larger plants and continue outward, by height.

Sellers should choose their landscaping materials carefully.Sellers should choose their landscaping materials carefully.

Create a green way
Sellers would be smart to complement soil-dwelling shrubs with potted plants, Better Homes and Gardens reported. Adding a few planters or pots will liven up the space and carry your green theme into the interior.

Pick out vessels that match your home's aesthetic and underline prospective plants. According to This Old House Magazine, pots painted in muted tones are the best option. If you plan to install plant groupings, look for containers 12 inches wide and at least 8 inches deep. And, most importantly, make sure your new pots have pre-installed drainage holes. Water-logged plants are no good.

Next, find a nice blend of foliage to fill your planters. However, fight the urge to overstuff.

"A lot of plants are fine, but a lot of different kinds of plants starts to look messy," landscaper Ellen ­Zachos told the magazine.

Finish off your planter project with a heavy does of packaged planting mix. Most blends contain sterile soil, or soil that has been treated to kill subterranean pathogens and other harmful bacteria. Soilless mixes are also available. These usually contain peat moss and other soil substitutes.

Transform your yard
You don't have to confine your planting project to the few square feet encircling your home. According to the National Wildlife Federation, many homeowners are embracing native plants as an alternative to traditional green grass. 

Native plants normally live longer than two years and feature aggressive root systems that reach deep into the soil. As a result, they rarely need fertilizer and require little watering. According to experts, these characteristics make native plants perfect for sustainable landscaping projects. Their deep roots slow erosion, the University of Minnesota reported. Plus, the plants themselves absorb harmful chemicals found in soil.    

So, consider devoting at least a portion of your yard to native plants. However, if you do go in this direction, be prepared to put in work. The planting process includes a lot of eccentric steps. For instance, native plant seeds must undergo a two-month long cold treatment to germinate. Landscapers advise sellers to plant on overcast days.

Additionally, removing your existing grass will require extensive rototilling. You will also have to maintain some of your current lawn care habits.

"The problem with the native-plant movement is that people think they can stop mowing their lawns and just sprinkle seeds from prairie-in-a-can," Doug Tallamy, Ph.D., a professor of entomology at the University of Delaware, told the NWF. "But we're not suggesting you abandon landscaping. You do have to fit in with the cultural norms."

In the end, the work is well worth the reward. Many buyers, especially the eco-friendly kind, will flock to your property looking to make a deal.


Top spring home-selling tips you need to know

As flower bulbs burst through the soil searching for sun, homebuyers and sellers prepare for the real estate rush that occurs every year during the spring months. According to Realtor.com, individuals looking to sell their homes over the next few months should be excited. Experts say it's shaping up to be a seller's market, as home prices continue to rise and inventory remains relatively low.

However, before entering the fray, sellers should consider a few essential spring-selling guidelines.

  • Get organized and clean up clutter: The home-selling process can move fast – one minute you're contacting a real estate agent and the next, you're leading strangers through your bedroom. So, start things off by deep cleaning your home. Potential buyers don't want to pull up to an unkempt yard or traipse through a cluttered home. Call a cleaning service and put on a fresh coat of paint.

    "When you walk into a nice hotel room, everything is nice and sparkly clean. You want the same thing for your house," Sheryl Grider Whitehurst, managing broker at Traders Realty in Peoria, Illinois, told U.S. News & World Report.

    Additionally, take a look at your landscaping. A few simple outdoor adjustments can improve curb appeal and net you more cash.
  • List now: Once you've prepared your home for sale, list, list, list. It's best to do that between April and June when buyers are plenty, reported Realtor.com. Also, don't write up some run-of-the-mill property rundown. Create a listing that both touches on the essentials and tells a personal story – buyers aren't simply looking to purchase a structure, they're in search of a home. However, keep your anecdote short and stick it near the bottom.

    According to Zillow, most buyers receive 10 or more listings per day via mobile real estate applications or agents. So, put the essential particulars at the top in a bulleted list. Include the
    location, number of bedrooms and bathrooms, square footage, lot size and the closest school district. Lastly, don't go over 250 words and include photographs.
  • Offer incentives: Last year, 37 percent of sellers offered incentives, reported Realtor.com. Millennials and other young buyers fear expensive closing costs so many sellers offer to pay these fees in hopes that they will receive full asking price and score a quick sale. This is certainly a wise strategy for those looking sell their homes this spring. Last year, millennials accounted for one-third of the total home sales. Experts say these young buyers will continue to dominate the market throughout 2016. 

Before testing the spring housing market, make sure to hire a home inspection company to look over your property and make sure there are no hidden issues. An energy audit might also be a good idea. Learn more about both of these services at our website

Spruce up your home for a spring sale

March is prime home-selling time, reported Zillow. Soon, buyers in the U.S. will be out in force perusing lawns, picking through basements and negotiating prices. Sellers planning to put their homes on the market within the next few months must prepare for the checkbook-toting masses by doing a little spring cleaning. But before you start tearing apart your home, look over a few key home-improvement guidelines.

Clean up
The first step in the home-selling preparation process involves a lot of scrubbing. It makes perfect sense. Most buyers won't set foot in a home with dirty, explicitly lived-in interiors. Perform a detailed house sweep and clean out every cobwebbed corner and bursting broom closet. According to Lifehacker, sellers should cut out the clutter as well. Donate or trash unneeded items and rent a storage unit for those essentials you just can't bring yourself to throw out. Additionally, consider hiring a professional cleaning service to get rid of pet smells or other obnoxious odors. Remember, clean interiors signal to buyers that they're investing in a well-maintained home.

De-personalize
According to real estate experts, sellers should de-personalize their homes and give buyers a blank slate, so to speak. Relocate your collection of vintage signage to a storage unit and take down the family photos that line the walls. Once you have extracted all of those picture hangers, patch and repaint. Most home buyers like to see white on the walls, as the plain hue allows them to envision personal paint preferences. Additionally, if you have performed quirky customizations, consider taking them back to stock.

Do some staging
Cleaning up and moving out personal items isn't enough. You also have to stage. Reorganize rooms to best show off features and hide defects. Also, when reconsidering room setup, take into account local buyer profiles. For instance, if young families are moving into your neighborhood, transform an extra room into a small nursery. If you are really serious about staging, you can even hire a professional home stager.   

Spend to earn
Sellers might want to consider making substantial changes, reported Money. The garage door is a good place to start. Most homeowners recognize the high-pitched shriek most door chains emit after years of regular use. According to This Hold House, you can cut down on the cacophony by adding noise-proof rubber padding to the equation. You can swap the whole thing – motor and all – for a few hundred dollars. And, consider replacing the door with a more aesthetically-pleasing model. You can nab a new door for $3000 to $8000, including labor.

Consider curb appeal
Buyers often place a high premium on curb appeal. Of course, this makes perfect sense – initial gut feelings mean a lot. In fact, studies have show that consumers who act on inexplicable urges are normally more satisfied with their purchasing decisions than those who take an analytical approach, reported Psychology Today. So, make sure you thoroughly address the exterior of your home before putting it on the market. Repaint and reseal outdoor surfaces such as doors and window frames. Also, address any landscaping flaws and plant some nice flowers. Daylilies, petunias and zinnias are good for springtime. 

Prepare for an energy-efficient future
According to the National Association of Home Builders, energy efficiency is particularly important to modern homebuyers. To meet buyer expectations, sellers must first request an energy audit to spot deficiencies. Once you have fixed key trouble areas, maximize your home's efficacy by making a number of small changes. Install low-flow bathroom and kitchen sink fixtures, switch to compact florescent light bulbs and install more ceiling fans to cut back on the need for air conditioning. Additionally, programmable thermostats lower utility bills and improve overall energy-efficiency, reported U.S. News & World Report. Don't worry too much about the cost of these improvements. The Department of Energy offers tax breaks to homeowners who meet its energy-efficiency standards.     

4 ways to sell your home faster

Understanding when and how to best list your home for sale relies on a range of different factors including the season, selling price and features of the property. Although interest rates are low as of now and demand for property is high, some sellers just aren't sure how long the current market will last.

With the weather returning to its spring-esque temperatures and sunny skies, now could be the best time to make a move toward entering the home market. Sell your home quicker with the following four tips in mind:

  • Create a staged, but natural appearance: Staging your home to showcase its best features is important, as it helps buyers see how their time will be spent there. Staging has been proven to sell more homes than just opening a home for show with no preparation.
  • Determine exactly why you want to leave: Pinpoint what features of the home no longer work for your family, and spin the issues into positives for potential buyers. In doing so, a more personalized view of the home can be created.
  • Invest in energy efficiency: Completing an energy audit in the home can add to buyer appeal, enhancing features and saving money in the future. By pointing out efficient practices in the home, buyers are more likely to want to learn more.
  • Think about timing: According to Yahoo Finance, home sales reach their peak in late June, but listing by mid-March is best. Homes sold between March and mid-April sell 15 percent faster, and for 2 percent more than their listing price. Timing can also enhance the sale in terms of weather, especially when it comes to the outdoor appearance of the home.

Consider scheduling a consultation with Alban Inspections experts today.

Top winter home selling tips you need to know

If you're planning on selling your home in 2016, you just may be in luck. Many experts are forecasting great conditions for home sales this winter across the U.S.

"The 2016 housing market is forecasted to be mainly a seller's market, filled with increasing home prices, relatively low inventory, and fierce competition between buyers," says Jonathan Smoke, chief economist for realtor.com.

With this information in mind, how can you close the best deal for your sales? Keep the following three tips in mind:

  • Design with buyers in mind: An open house during the winter must have two distinct features a warm and inviting feeling. As the winter months can be cold, it's important to ensure potential buyers are warm and comfortable during their time in your home.
  • Offer some form of incentive: Some experts believe the winter is a less busy time to list, while others see it as one the busiest of the year. To be on the safe side, consider offering an incentive such as lowering closing costs or shaving some money off the top of the asking price. According to Realtor, 37 percent of all sellers offered incentives to attract buyers this past year alone.
  • Price your home to the market standard: 2016 prices are expected to rise by at least 3 percent this year. With this in mind, be sure to list your home with the best price possible. Play to the market, but also be sure to give yourself enough wiggle room in terms of changes. Check out the listings of nearby homes and ask around for the perfect number.

Before selling your home, also consider investing in an energy audit. By displaying the energy efficiency of your home, some visitors may be more inclined to buy. Learn more on our website.